Develop a simple text editor
Table of content
- Create new project
- Project meta-data
- UI scheme design with afxml
- Styling the UI scheme with css
- Application Code development
- Application error handling and debugging
- Release the project
Create new project
With AntOSDK and CodePad, application can be developed, built and tested directly from browser. Basic features:
- Automatically generate project template and files
- In browser Coffeescript to javascript compiler
- Automatically build, run and test project directly from browser
- Automatically generate release package in zip format that can be put on the MarketPlace for distribution
This post serves as a beginning guild to AntOSDK and AntOS application development. Readers can follow the steps in this tutorial by accessing to the CodePad application available on the demo version of AntOS at : https://os.iohub.dev/ (user and password: demo). The complete source code of the project can be found on this repository https://github.com/lxsang/antosdk-apps
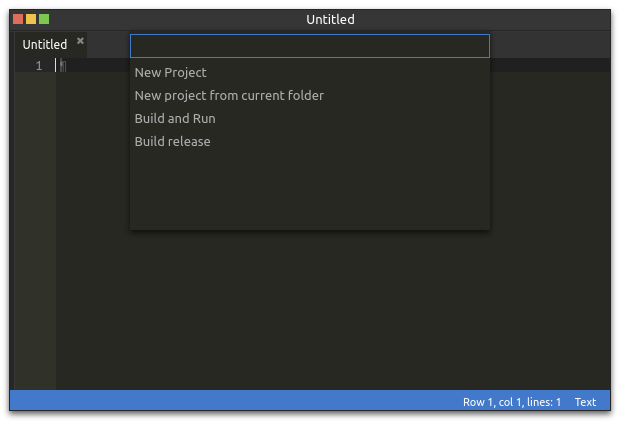
First create new AntOS application project from CodePad using the command palette, three ways to access to the command palette:
- Via application menu > View > command palette
- Via the **Alt+P **shortcut
- Or, by right click on the editor and select **Command palette **from the context menu
From the Command palette, navigate to AntOS Software Development Kit > New Project
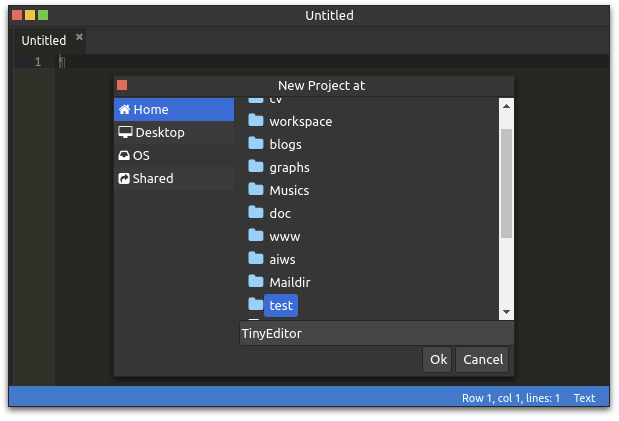
From the new project dialog, let's create a new project named TinyEditor in home://workspace/test:
The SDK will then generate all necessary files and open the development window as follow:
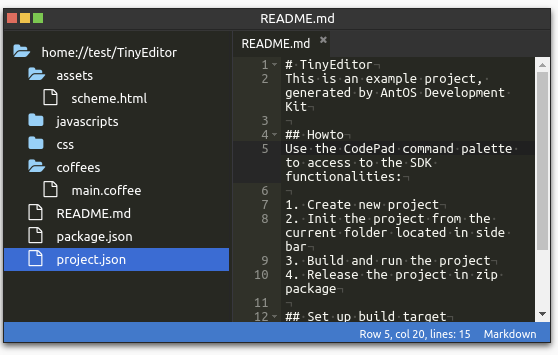
The development window is simple, the project files can be accessed via the file panel on the left. The main big area of the window is the editor. By the SDK convention, the generated project files has the following structure:
TinyEditor/
├── assets
│   └── scheme.html
├── coffees
│   └── main.coffee
├── css
├── javascripts
├── package.json
├── project.json
└── README.md
- assets: contains all project asset files such as images, schemes, etc. The generated scheme.html is the main UI scheme of the application.
- build: the built code/application will be stored in the debug folder, the release folder is where the SDK put the release Zip package of the application. There folder will be created automatically by the SDK.
- coffees: contains all coffee script files, the generated main.coffee is the main application code.
- css: all application stylesheet (CSS) should be put here
- javascripts: additional Javascript libraries go here
- package.json: application metadata
- project.json: the project file, used by AntOSDK to configure project location and build options.
- README.md : project documentation
Project meta-data
Project meta-data can be configured in the package.json file, its basic format is as follow:
{
    "pkgname": "TinyEditor",
    "app":"TinyEditor",
    "name":"Simple Editor",
    "description":"A very simple text editor",
    "info":{
        "author": "",
        "email": ""
    },
    "version":"0.0.1-a",
    "category":"Other",
    "iconclass":"fa fa-adn",
    "mimes":["text/.*"],
    "locale": {}
}
Application icon can be configured using the icon or iconclass attribute. The mimes is an important attribute configuring the file types that the application can open. This information is useful since it allows the system to identify which application can open a file when user double click on it. For the purpose of this tutorial, as we want to develop a simple text editor, we can configure this attribute with the value "text/.*", which means that the application can open any file whose mime type start with "text".
The locale configuration is used to specify how application texts should be translated between different locales. The system locale API use this configuration to translate the application to the configured system locale. More information on system and application locale can be found in the Localization and language chapter.
Now build and run the application by accessing Command palette > AntOS Software Development Kit > Build and Run.
An empty window appears since we didn't add anything to the application code. Close that window, open the File Manager application and double click on a file whose mime start with "text". Thanks to the application meta-data, you should see the TinyEditor application in the list of the OpenWith dialog.
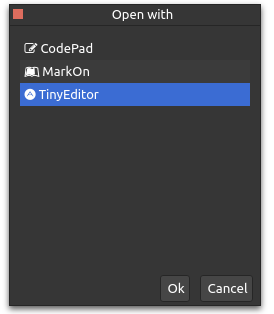
Select TinyEditor and click OK will run the application (Just an empty window for now).
UI scheme design
AntOS provides a XML-like scheme syntax that allows to layout the UI widgets inside an application window using AFX API. Please refer to the API documentation for more information on the AFX API. Open the assets/scheme.html file, and modify it as follow:
<afx-app-window apptitle="__(Text Editor)" width="500" height="400" data-id="TinyEditor">
    <afx-vbox >
        <textarea data-id='editor'></textarea>
    </afx-vbox>
</afx-app-window>
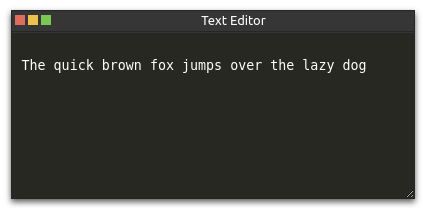
The scheme is pretty simple, it contains a window widget with a textarea inside an afx-vbox. AntOS' scheme use afx-vbox and afx-hbox as main layout elements to organize other UI widgets. The textarea is just a normal HTML textarea element. Now build and run the application, you should see the textarea inside the window.
Styling the UI scheme
Styling the UI scheme is done via CSS, create a main.css inside the css folder (in the project tree), then add the following CSS snippet:
afx-app-window[data-id="TinyEditor"] textarea[data-id="editor"]
{
    background-color: #272822;
    color:white;
    margin: 0;
    padding:10px;
    border: 0;
}
This sets the textarea color and background-color as well as some padding and margin.
By default, the project's build target doesn't contain any CSS file, one need to add the newly created CSS file to the build target. This can be done by modifying the project.json file as follow:
{
    "name": "TinyEditor",
    "root": "home://test/TinyEditor",
    "css": ["css/main.css"],
    "javascripts": [],
    "coffees": ["coffees/main.coffee"],
    "copies": ["assets/scheme.html", "package.json", "README.md"]
}
Rebuild and run the project and you should see the styled textarea inside the editor application window.
NOTE: From now on to incorporate any additional files into the project, such as CSS, asset files, javascript libraries, etc., these files should be added to the project.json
Application code development
Application code cam be developed either using Javascript or Coffeescript. In this tutorial, we use Coffeescript to develop the application. Readers should have basic knowledge about this language or refer to this link first: https://coffeescript.org/. The generated coffees/main.coffee file contains the base class of the application:
class TinyEditor extends this.OS.application.BaseApplication
    constructor: ( args ) ->
        super "TinyEditor", args

    main: () ->
    # your application code here

this.OS.register "TinyEditor", Tinytditor
All AntOS application classes should extend the BaseApplication class provided by the core API. The main() method at line 5 will be called automatically whenever the application run, subclasses should implement this method to specify the application behaviors. The code in line 8 is necessary to register the application classs (TinyEditor) to the system.
For this application, the main method is implemented as follow:
main: () ->
    @editor = @find "editor"
    @bindKey "ALT-N", () => @newFile()
    @bindKey "ALT-O", () => @openFile()
    @bindKey "CTRL-S", () => @saveFile()
    @filehandle = if @args and @args.length > 0 then @args[0].path.asFileHandle() else null
    $(@editor).on 'input', (e) =>
        return if @filehandle.dirty is true
        @filehandle.dirty = true
        @scheme.apptitle = "#{@filehandle.path}*"
    @read()
In line 2 we access to the UI element (the textarea) defined in the scheme file above using its data-id attribute. Line 3,4, and 5 bind keyboard shortcuts to the application for three operations: create new file, open an existing file and save a file Line 6 initializes an instance variable (filehandle) which holds a file handle using the VFS interface. Since our application manipulates a file, all read/write from/to the file will be performed via this file handle. Lines 7-10 handle the input event of the textarea. Basically, when user inputs data to the textarea, the application will mark the filehandle as dirty (need to be saved later) and change the title of the application window. Lastly, we call the read operation to read the file content via the file handle.
So, there are some missing methods need to be implemented:
- newFile: User create a new empty file
- openFile : User open an existing file
- saveFile: User save the file
- read: actual read of a file via the VFS interface
- write: actual write to a file via the VFS interface
The first three methods newFile, openFile and saveFile are pretty simple:
newFile: () ->
    @filehandle = null
    @read()

openFile: () ->
    @openDialog "FileDialog", { title: __("Open file") }
        .then (d) =>
            @filehandle = d.file.path.asFileHandle()
            @read()

saveFile: () ->
    @filehandle.cache = @editor.value
    return @write() unless @filehandle.path is "Untitled"
    @openDialog("FileDialog", {
        title: __("Save as"),
        file: @filehandle
    }).then (f) =>
        d = f.file.path.asFileHandle()
        d = d.parent() if f.file.type is "file"
        @filehandle.setPath "#{d.path}/#{f.name}"
        @write()
For the detail of all the APIs used in the code, please refer to the API documentation.
The newFile method just sets the file handle variable to null, then calls the read operation, which in turn creates an empty file handle.
The openFile method opens a FileDialog then refers the file handle variable to the selected file before calling the read operation.
The saveFile method first sets the internal cache of the file handle variable to the editor value. It then rewrites the file using the write operation if the file already exists, otherwise it opens a FileDialog for file selection before calling the write operation.
The read and write operations are implemented as follow:
 read: () ->
    @editor.value = ""
    if @filehandle is null
        @filehandle = "Untitled".asFileHandle()
        @scheme.apptitle = "Untitled"
        return
    @filehandle.read().then (d) =>
        @scheme.apptitle = @filehandle.path
        @editor.value = d
    .catch (e) => @error __("Unable to read file content")

write: () ->
    @filehandle.write("text/plain").then (d) =>
            @filehandle.dirty = false
            @scheme.apptitle = "#{@filehandle.path}"
        .catch (e) => @error __("Error saving file {0}", @filehandle.path), e
For the detail of all the APIs used in the code, please refer to the API documentation.
The read method checks if the file handle is null, it will create an new empty file handle if it is the case, otherwise, it reads and puts the file content to the editor (textarea).
The write method writes the internal cache content of the file handle to the actual file and reset the dirty flag of the file handle.
Until now, all the basic operations of the application are implemented. The application can be built an run, user can hit ALT-N to create new file, ALT-O to open a file and CTRL-S to save the file. A text file can be opened directly by double clicking on it from the File application, then select TinyEditor from the OpenWith dialog.
Adding File menu to the system panel
In AntOS, when an application is selected, its menu will appear in the system panel, to define this menu, one need to implement the menu method in the application class, the following snippet shows an example of menu for the text editor:
menu: () ->
    m = [
        {
            text: "__(File)",
            nodes: [
                { text: "__(New)", dataid :"new", shortcut: 'A-N' },
                { text: "__(Open)", dataid :"open", shortcut: 'A-O' },
                { text: "__(Save)", dataid :"save", shortcut: 'C-S' }
            ],
            onchildselect: (e) =>
                switch e.data.item.data.dataid
                    when "new" then @newFile()
                    when "open" then @openFile()
                    when "save" then @saveFile()
        }
    ]
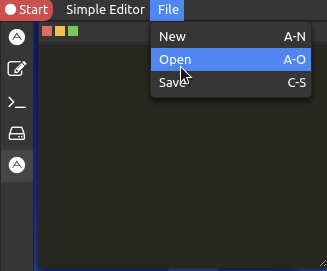
This is how the final application and its menu look like:
Application error handling and debugging
There are two kinds of error that can occur during the development process:
Compile-time error
Compile time error can occur when the SDK tries to compile application code developed in Coffeescript to Javascript. This kind of error is often syntax error.
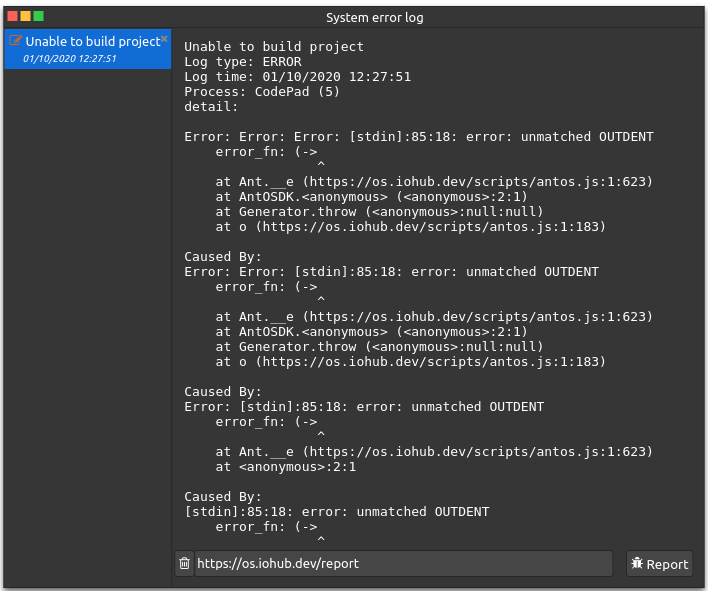
The default Syslog application allows to track any error in the system and thus can be used to debug AntOSDK compile error. For example, put the following line to the code:
error_fn: (->
Then build the project, the SDK will notify that it cannot build the project due to error. Now open the Syslog Application, you should see the detail track of the syntax error in the application
Run time error
Run time error may occur when the application is executed after building. The error track can be found either in the Syslog application or in the Browser development tools.
Release the project
To release a project for distribution, go to Command palette > AntOS Software Development Kit > Build release, the release file archive can be found in the build/release directory.
Comments
The comment editor supports Markdown syntax. Your email is necessary to notify you of further updates on the discussion. It will be hidden from the public.